Fermented Drinks for the Endometriosis Diet
FERMENTED BEVERAGES FOR THE ENDO-BELLY
If you want to make your gut happy, you may need to jump through a few hoops. But one of the easiest things to do is add in probiotic rich options (if you can tolerate them!). And one of the tastiest ways to do this is through delicious drinks!
So many of our common foods and beverages are made from the process of fermentation, or used to be. Coffee needs to be fermented before it’s roasted, as does tea and cocoa. But these beverages aren’t living ferments by the time they arrive at our table. They need to be fermented in order to achieve the desired flavor, but the beneficial bacteria are gone. The drinks that used to be popping with beneficial bacteria include beer and wine, soda pop, root beer, ginger beer, and more. In times of poor sanitation, it was actually healthier to drink diluted beers or wines instead of water, since fermentation helps kill off bad pathogens and replace them with good ones!
Nowadays, though, most all sparkling beverages we come in contact with have either been pasteurized or carbonated to get that delicious fizz. Yes, we have clean water that won't kill us with cholera (and I count my blessings for this!), but we're missing out on a daily flood of probiotic rich bacteria from all these beverages that once were the norm.
That's why I want to here show you how you can make your own living, probiotic rich beverages at home and get all the benefits of the different strains of bacteria within. These are the beverages you can add to your healing arsenal since many of them are medicinal. Others are less medicinal, but still delicious on a hot summer day :)
Most cool of all, these are just a few of the thousands! Be sure to check out Sandor Katz’s books, amongst others to start your own fermentation revolution.
WHEY
Whey is first of this list because it’s often an important ingredient to ferments, and is quite different from your store-bought whey protein powder. They whey I speak of is the clear liquid that separates from your milk ferments, and one that is a probiotic rich potion! Seriously, it’s like liquid gold in my fermentation cupboard.
How to make it: The only way that I know of to get this type of whey is to make it at home. You can use homemade or store bought yogurt and pop it into a cheese cloth bag with a bowl underneath to collect the liquid. As a cool side product you'll get a thick, greek-like yogurt or yogurt spread.
If you make homemade kefir you’ll see the separation of the curds from the whey after a day or so of fermenting. Either carefully scoop off the curds to preserve the whey, or do the same as with the yogurt and pop the whole thing into a cheese cloth bag.
How to use: Whey is most often used as a starter for all your other ferments. You can add it to your veggie ferments in lieu of extra salt, to your homemade sparkling beverages, and of course in your grain soak-water. You can even just drink it plain for some good ‘ol probiotic fluids.
Remember that both yogurt and whey have a different microbial makeup, so the whey will also behave a bit differently. Kefir’s whey is known to be more probiotic rich and is best for starting anything you want to be fizzy, since it also has yeasts in it.
DAIRY KEFIR
Kefir is a fermented drink that’s thicker than milk but more drinkable than yogurt. Depending on how long you ferment it, kefir can taste mild to super-sour, and sometimes even a bit fizzy. Oh yah, it’s also a powerhouse of nutrition, almost totally lactose free, and full to the brim of gut healing, allergy killing, gut mending probiotics. If you want to learn more you can check out my post HERE.
**Dairy kefir grains are quite different from water kefir grains - they only eat milk. So make sure not to confuse the two and mix these into dairy-free liquids.
How to make: Kefir is made from “grains”, which are a mixture of yeast and bacteria that kind of resemble cottage cheese. You add these grains to your milk and let sit at room temperature for about 24 hours for milk kefir, or 48 hours for more sour, lactose free kefir. Because the grains will end up settling on the bottom of the jar, make sure you shake it once or twice during the ferment.
To strain simply shake up the mixture one last time and pour into a fine, mesh sieve. Use a spatula to “scoop” along the strainer to separate the grains from the kefir. This will be more of a challenge if you use raw milk because it stick more to the grains, so have more patience if you do this :) Whatever you do, don’t push down on the grains to force anything though the strainer, as this will squish the grains and all through and you’ll have nothing left for your next batch. Just FYI, it’s okay if you eat the grains - they’re fine to eat - you just don’t want to lose them since you need to add grains to each batch of kefir you make.
Challenging? Not at all, except for the fact you need to stay on top of this ferment so give yourself time to get into a rhythm. My rhythm is this: I get raw milk on Monday, to which I add kefir grains. Wednesday - 48 hours later - I strain them and add to my new milk. Friday - 48 hours later - I strain them, but since I don’t have raw milk I then keep them in a jar in the fridge with some extra kefir until my Monday milk comes again. The grains will keep easily in the fridge if you need to hold off a week or so, just make sure they have something to feed on, like milk or kefir.
How to use: drink plain, blend into smoothies, or put into a cheesecloth to separate the whey and make a thick “kefir yogurt” that’s similar to greek yogurt.
BEAUTIFUL BEET KVASS

My homemade beet kvass
I’m currently obsessed with beet kvass. It’s so not your average American beverage - a salty, bubbly, earthy drink - but one that is incredibly medicinal. Let your body get over the initial shock of drinking something salty, and after a few days you’ll find your body starts to crave it all on its own. Plus, it's an extremely beautiful color :)
That’s because beet kvass is quite medicinal. It’s a super-aid for liver congestion, helps your kidneys clean the blood, aids digestion a LOT (especially if you deal with chronic constipation), and can be used to help treat both gall bladder or kidney stones. Plus it’s probiotic, so drink up girls :)
How to make: There’s a variety of recipes, but my personal favorite by far is Dr. Natasha Campbell-McBride’s (she invented the GAPS diet):
Slice 1 medium size beet into thin slices
add to a 2 liter jar with 1-2 tbsp sea salt, 1 cup whey, and some fresh ginger root if you want.
Let it ferment 2-5 days, then seal and stick in your fridge.
Drink 1 cup at a time, then refill the jar with water so you always have 2 liters of beet kvass in your fridge. When the kvass finally starts to get pale, the beet is spent and you can make a new one, but this should last you a while.
How to use: Drink it! Again, give your taste buds some time to adapt, but then you’ll hopefully learn to appreciate this fizzy, salty drink. You can also use it as a base for salad dressings or marinades if you like.
KOMBUCHA
You want to know something? I’m sorry to say, kombucha is just another fermented beverage. I want to say that upfront since we’re become quite the kombucha obsessed society these recent years! Just like any ferment, kombucha can be very beneficial to your gut micro-biome, but you should know it’s not necessarily the magic elixir we hear is the cure all from cancer to fatigue. But it’s still a great beverage from time to time!
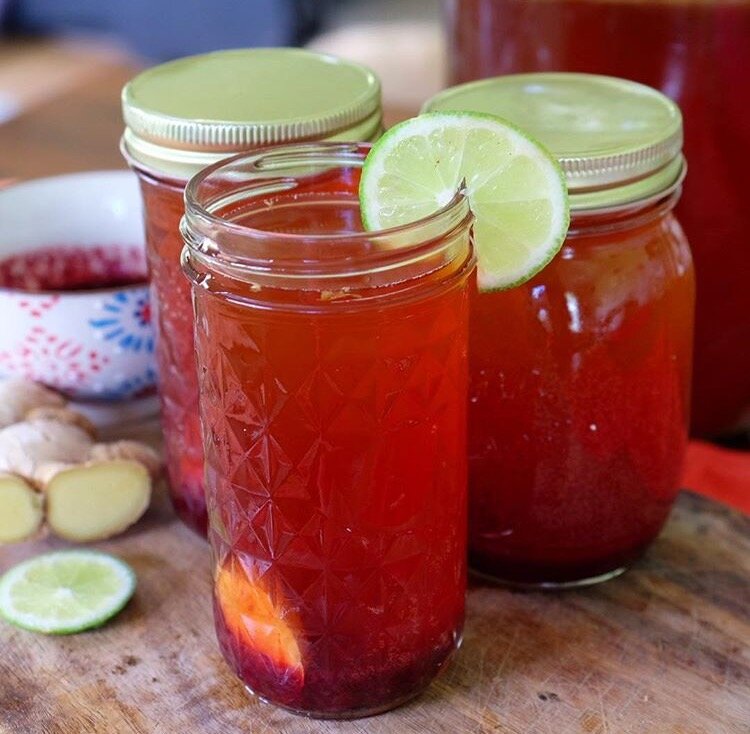
My own homemade ginger blackberry kombucha, double fermented in individual jars so i can easily grab out of fridge.
The one bad issue I see with kombucha is that it’s often much too sweet. I’ve bought many kombucha’s that taste like soda, and these types aren’t going to be helping as much as you think. They’re better than soda, yes! But if you’ve gotten in the habit of replacing your sweet fix with a kombucha a sweet is still a sweet.
When you make kombucha at home, you realize how sour it can get! Add a little juice for a double ferment and it can be fizzy, lightly sweetened, and a really nice tonic.
How to make: Kombucha is really just sugar-sweetened tea.
The basic brew is 8 tea bags, plus 1 cup sugar, per gallon of water.
The tea needs to be actual tea (like black or green) rather than herbal tea, and kombucha prefers white sugar to something “healthy” like maple syrup.
To this now cooled mixture you add your kombucha SCOBY (symbiotic colony of bacteria and yeast) and let sit covered (but not sealed) in dark place for about 1 week. It should be done now, and ready to drink or to double ferment.
A double ferment is when you make a fermented food bubbly, so in the case of kombucha it’s when you make it fizzy. To do this you:
remove the SCOBY and add it to your next brew.
To your ferment, add some sweet juice of choice to your jar so it’s re-sweetened and flavored, and then seal tight for 24 hours.
After that you should transfer it to the fridge quickly since second ferments can become combustable from the pressure and possibly shatter the glass! Now you should have fizzy, lightly sweetened kombucha.
How to use: obviously as a refreshing beverage, but you can also ferment your kombucha much longer to get vinegar for salad dressings or marinades. Feel free to experiment!
LACTO-FERMENTED SODA

This drink isn’t a health tonic, persay, since it’s still quite sweet, and you should be careful drinking too much if you have candida or react to sugar - but it sure is fun to make for special occasions! You have to prepare a few days in advance, but it’s quite simple.
How to make: The basic premise is you take sweetened juice of any kind and add whey (for 1 liter of juice you would add 1/4 cup whey), and leave covered (but not sealed) at room temperature for about 24 hours, until the beverage is bubbly. Then seal the bottle tightly and let it ferment until pressured and bubbly, about 24 more hours. Transfer to fridge quickly to avoid excess pressure and possible explosions ;)
How to use: drink it in lieu of soda as a fun treat.